
First, I need to acknowledge the source and inspiration for the air brushing and piercing work that I have been doing for the past 18months. In August 2005 I was privileged to see Binh Pho doing his piercing and colouring at the AWGB seminar.
If you haven't checked out his work, I suggest you do so immediately - and then buy his instructional videos!
It is possible to get a simple air brush for under 30 pounds, but you get what you pay for - the airbrush Binh Pho recommends is readily available. You really need the control it allows - but it will cost you a great deal more!
The paints he uses, 'Golden', are also available in England. I have tried airbrush acrylics from the local shop, and they do work, but the 'Golden' ones I bought do seem to flow and mix very well.
My work does not aspire to the complexity of Binh Pho's work.
These are the techniques I have developed from seeing his work.
Preparing the surface
On very thin work, there can be problems with paint bleeding from the front to the back of a piece, especially on something like ash.
I have found that if I take the sanding down to much finer grits than usual, the surface will not allow the paint to soak in (120 grit, 180, 240, 320, 400, 600, 800,1000, 1200, 1500, 2000) - of course that means it will not want to stick either - so it is necessary to add airbrush medium to the paint as this helps it to cling. You need to make light passes with a fine spray and gradually build the colour density or it can clump in droplets and dry 'spotty'.
I try to be fairly spontaneous about colour and mix it in the airbrush as I paint so that colours blend.
The 600 to 2000 grit papers are 'wet and dry' papers that I get from model engineering exhibitions. I understand that car shops like 'Halfords' should stock some of them.
Masking the area
'Frisket' (low-tack tacky-backed plastic) is the normal medium to use to mask an area for air-brushing. Designs drawn onto the frisket can be cut out with a craft knife. I am afraid I find this a bit tedious, so I have turned to another craft-shop card-making stand by, the paper punch. These come in a variety of sizes and designs.
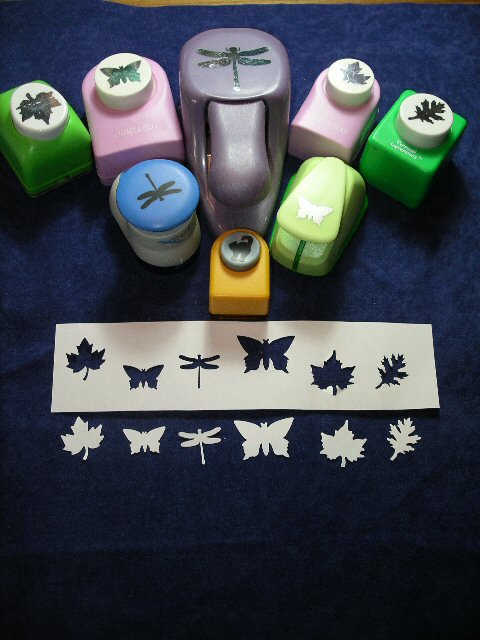
The shapes can be cut directly into the frisket and either the positive or the negative used to mask areas. This allows you to have areas of colour with silhouettes and plain areas with the shape in colour.
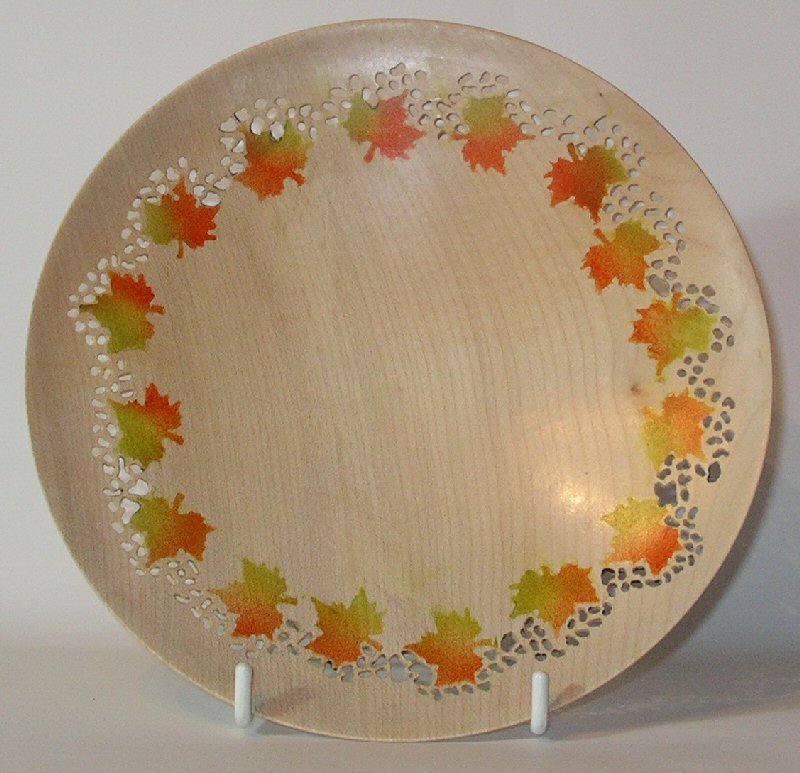
The metal part of the mechanism for the small maple leaf (top left) was what I used to cut thin copper sheet into the leaves that I put onto the Autumn Woodland piece. (See Helpful Hints 6) It had to be done in a vice to get enough pressure and there were a fair number of jewellery techniques used to texture and shape the leaves, but the simple card cutter started it all off!
I have even found that low-tack masking tape can be used, although I would recommend that you do the painting immediately as, if it is a damp day, the edges can lift and the painted shape will not be crisp.
Finishing the piece
I finish my air-brushed pieces with an acrylic lacquer spray - gradually building up a number of thin coats. I then use a wax polish on it...
Sampler

Solid colour with stickers to leave the silhouettes of objects when they are removed, and plain wood, which has been masked with Frisket with small leaf cut-outs.
Other Decorative techniques
Over the years I have tried out numerous other techniques and if I put them all here, this section would be more like a book. So, if you are interested in finding out more, go to the contacts page and email me to request the 'Decorative Techniques' file that I am happy to send out to anyone who asks. I don't aim to make money for myself for my turning or my ideas - so if you are happy with it when you get it, make a small donation to a charity dear to your heart next time someone waves a collection box at you.